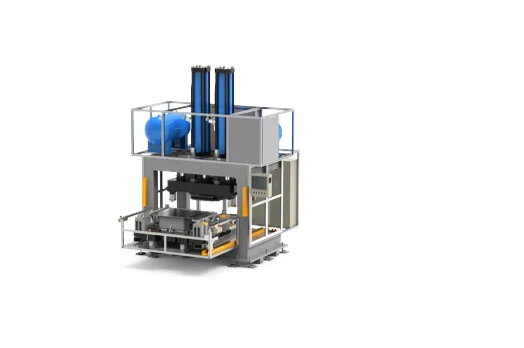

Portability is an attractive promise when large panels are awkward to move around a factory. Bring the joining tool to the workpiece, leave the panel on its support and avoid another lifting operation. But portable clinching tools still have to reach the joint from the required directions. Buyers who check only the tool’s outline miss the much larger working envelope created by the operator, hoses, suspension and panel itself.
Start with the hardest location. In a hypothetical enclosure assembly, a long open edge offers easy access while a corner beside a return flange prevents the same tool from reaching its mark without colliding with the part support, so a successful demonstration on the open edge says little about whether the proposed purchase can complete the enclosure. Resolve that corner before comparing prices.
Separate the Tool Envelope from the Workplace Envelope
SIMITCH offers C-type and X-type portable configurations for sheet-metal joining. Its portable-tool guidance calls for an access review using the workpiece geometry and intended approach, with final tooling and force selection subject to the actual material stack. Those frame descriptions identify possible routes, rather than proving that a particular panel fits.
Ask for a controlled tool drawing. Outline the punch and die, frame, handles and connections in the positions occupied during approach and withdrawal. Overlap that outline with the panel, its fixture and any nearby conveyor or bench. Record which dimensions remain provisional. Catalogue photographs are useful for discussion but give the buyer no dependable clearance.
Leave space for the person doing the work. During a layout review, let an operator describe how the panel arrives and where the tool waits between joints, because an apparently clear approach in a drawing may require a hose to cross a walking route or put the return motion directly above an unfinished part. A neat drawing is only the beginning.
Review Every Joint before Selecting a Frame
Joint locations have different access conditions. Map them individually and group only those that truly share an approach. Changes in flange direction, local bends or nearby components deserve their own review. If the tool fits after a bracket is fitted but cannot be withdrawn afterward, the assembly sequence needs attention.
TWI’s clinch-design guidance identifies access for the punch and die, flange geometry, joint spacing and fit-up as design considerations. Joining force is not meant to compensate for a large initial gap. For the buyer, that makes a review of the intended assembly arrangement part of equipment selection, rather than a detail to leave until installation.
Request an explicit answer for inaccessible joints. Portable clinching tools do not turn a closed cavity into an accessible flange; the options might involve changing the joint position, revising the assembly order or considering another joining method, and each option needs approval from the people responsible for the finished product. Keep unresolved locations on the quotation’s exception list.
Support the Panel before Assessing Tool Handling
Large panels need a stable presentation. Compare a supported panel with the same component held at an angle by the operator, then consider what happens when the tool approaches the far edge. That simple walk-through often reveals missing supports or an inconvenient workstation height. Correct the presentation first.
Include suspension and parking arrangements in the scope. Ask the supplier to explain what the operator holds, what the support carries and what happens when the trigger is released. Discuss hose routing through the complete movement. Any proposed change to the tool or workplace needs a competent safety review appropriate to the installation.
Try the work sequence with representative panels rather than an empty fixture. A tool may be easy to manipulate before production parts surround it, yet require repeated repositioning once the punch and die must pass around the actual assembly, the incoming-part trolley and the operator’s normal inspection position. Measure that sequence as a whole. Reach alone does not describe usability.
Put the Entire Joining Cycle into the Quotation
Portable clinching tools are purchased to complete assemblies. Their useful output therefore depends on loading, positioning, joining, checking and unloading, including movement between joint locations. Request a demonstration of the proposed sequence with the intended support arrangement. A fast forming stroke does not describe the time required to finish a large panel.
Compare suppliers against the same boundaries:
- Identify who supplies the workpiece supports and tool suspension.
- Show which joints are reachable in the agreed assembly order.
- Include the specified punch and die, connections and controls.
- Define how an unfinished panel is handled after an interruption.
- State the inspection work included in the demonstrated cycle.
- List the drawings, training and spare tooling delivered with the purchase.
Write down exclusions in plain language. If changing between panel variants requires another tool set or a different support position, ask for that work to appear in the demonstration and commercial scope rather than assuming that a portable device automatically provides quick changeover across everything the factory makes. Specific exclusions make competing quotations easier to compare.
Keep Access Approval Separate from Joint Approval
A reachable joint can still be unsuitable. Material behaviour, coating condition and the intended load require their own application evidence. Keep the access drawing alongside the accepted sample record, but do not let either document substitute for the other. Physical fit and process capability answer different purchasing questions.
Discuss both with an equipment supplier such as SIMITCH. Provide the troublesome corner view as well as the easy joint, and identify which side of the panel will remain visible in service. A useful response should connect the proposed portable configuration to the actual component while leaving any untested material or load condition clearly unresolved.
For subsequent design changes, revisit that connection. Moving a joint close to a bend, adding a reinforcing strip or changing the panel’s handling fixture can affect an arrangement that previously worked, even though the name on the tool and the machine settings remain unchanged and nobody has requested a new joining process. Review the changed geometry before accepting another production run.
Accept the Workstation with Ordinary Production Work
Plan handover around the operator’s job. Follow a panel from arrival through its final inspection, observing where the portable clinching tools are placed during pauses and how the work resumes after a normal interruption. Ask somebody other than the demonstration technician to explain the intended sequence from the supplied instructions.
Retain the agreed drawings and a clear record of the demonstrated variants. Label the tooling so the punch and die supplied at handover can be matched to the application documents. Arrange maintenance access before neighbouring equipment fills the spare floor space. Documentation and physical access are part of making the purchase usable.
The strongest reason to choose a portable system is that it makes a specific assembly task easier to execute within an approved process. Prove that reason on the difficult panel. If the proposed working envelope remains unclear, a different frame, revised fixture or changed joining location may be more useful than another discount on a tool that cannot reach its work.